
What is a Theremin?
Hello, in this video, I’m gonna talk about my newest MIDI controller, my Theremidi, a DIY MIDI Theremin. I’m going to talk about its building process, how it works, its features and how can you build one yourself.
Maybe you already know what a Theremin is, maybe you want one, maybe you do play one or maybe you are like me. You always wanted one but you know that it’s too expensive and too damn hard to play.
But maybe you never heard of the Theremin and you don’t know its importance in history. The Theremin was one of the first electronic musical instruments invented in history.
It was invented by Leon Theremin in the early 20’s. And the way it works is that it has two antennas that work as capacitive sensors that track the position of your hands. And depending on where your hands are, you can control the volume and the pitch of the instrument. However, it’s so hard to play.
It’s like playing a violin but without even the neck or anything. You really play it in the ear so it requires a lot of practice.
Why I built a MIDI Theremin?
Thinking about that, that is so hard to play and actually so expensive. A couple of years ago, I decided to try to build one myself. And actually, I built a MIDI version, called the Theremidi. Back then about 3 to 4 years ago, I actually sold a couple of units to some people. But I never did anything else about it and just stayed in the past.
However, a couple of weeks ago, a friend that actually bought one from me asked if I could fix hers. And I thought that was going to be a great opportunity to redo the Theremidi in a much better way. So that’s what I did.
So I told her to send me hers and I was going to try to save as much as it could and just start from there. In the end, I just saved the sensors and everything else I redid. And this is the enclosure of the first one. It’s in pretty bad shape.
The way I did the enclosure is just too bad. But back then, I didn’t know much what I was doing. However, this time I was able to do the Theremidi in a way that I am really really happy about it.
The Theremidi
Okay, so here’s the Theremidi. The first thing or the main difference between the original Theremin and this one, okay, this one is MIDI and the other one is a synthesizer. So this one connects to the computer through a USB cable. And you can actually choose any type of sound you want in your computer.
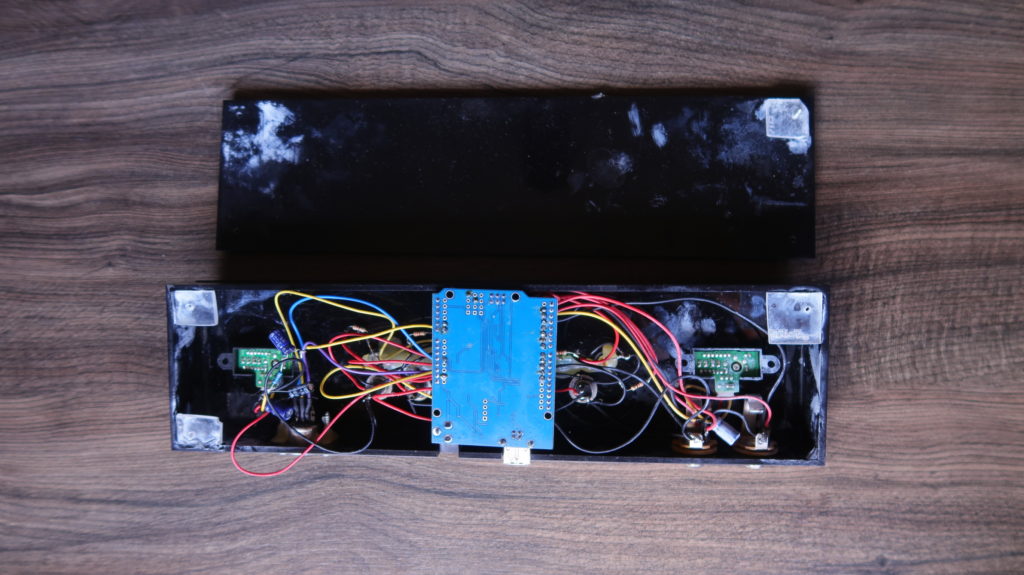
So, the big difference between my Theremidi and the original Theremin is in the type of sensor. The Theremin – the original one – uses capacitive sensors and this one I am using infrared distance sensors.
I have tested different types of sensors like ultrasonic sensors, and ultrasonic sensors actually work fine for big hard surfaces but I don’t think they work really well for for the hand. Maybe you find a good way to use it, but for me, those Sharp sensors, those infrared distance Sharp sensors were the best.
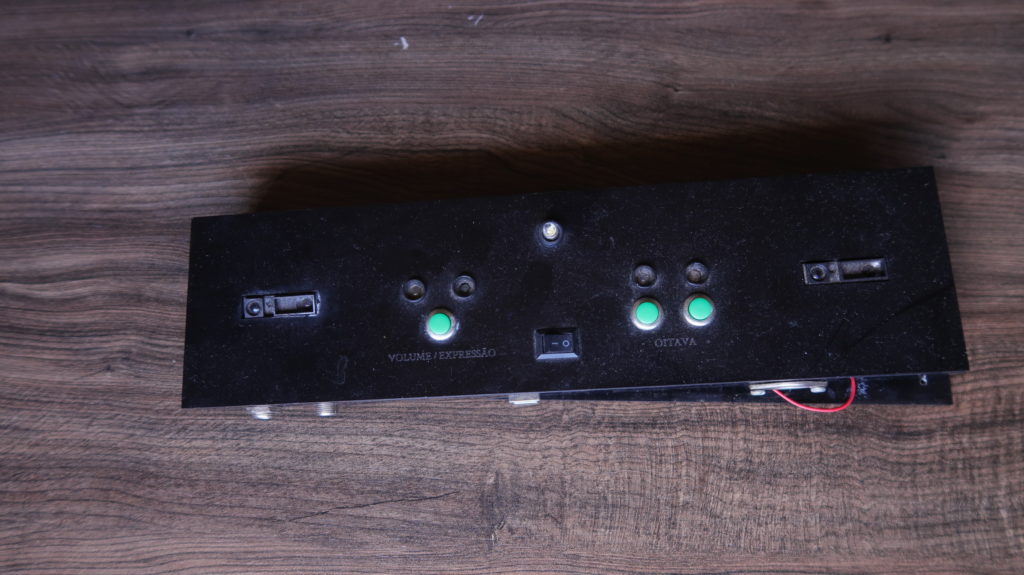
Those sensors are a little bit tricky because they have a lot of noise. But I found ways in the code and in the circuit to overcome this noise and have a more stable reading. And the big improvement from my last Theremidi or my first Theremidi to this one is that this one has a display and buttons that allow me to change its functionality.
How it works
The Theremidi has two IR (Infra Red) sensors that capture the position of the performers hand’s. The sensor are the Sharp GP2Y0A41SK0F and they have a range of about 4-30cm. And, also, the Theremidi has a display and buttons so you can change its functionalities.
You can change its octave, MIDI channel, transpose, and switch between pitch bend and scales.
Changing between MIDI notes and scales is pretty handy because you can either play always in tune, or make some crazy glissandos with any synth!
Another great feature of the Theremidi is that it is USB-MIDI class compliant, it is plug and play and you can use with any synth in your computer. Maybe I’ll add a physical MIDI out so you can play with you analog synths in the future!
How to build it?
For this project you’ll need some experience with an Arduino and electronics. I highly advise you to check out my free course the DIY MIDI controller workshop, where I’ll teach you all you need to know about Arduinos and how to build your first MIDI controller step-by-step for less than US$30! A great way to start!
Or if you feel you want to dive in you can check my full course the Making Music with Arduino, where I teach you how to build virtually any type of MIDI controller!
But, I’ll leave all the materials you need to build it. Although it’s a super powerful MIDI controller it is rather simple to build!
Materials
➡️ Arduino Pro Micro: https://amzn.to/2Vcz3Nz
➡️ Sharp GP2Y0A41SK0F: https://amzn.to/3biVfha
➡️ Oled Display: https://amzn.to/2LvnPB6
➡️ Button that fits in a 10mm hole (haven’t found a link yet)
Conclusion
The Theremidi is a great way for you to add more expression to your music and impress some people in the audience! Also, is a really powerful but cheap alternative to the original Theremin!
So, if you liked this post, share with your friends, like our video and subscribe to our social media!
Um abraço, Tchau!
Gustavo Silveira.