
MIDI is something that we take for granted, it just works. You plug your MIDI controller, open your DAW, choose your MIDI inputs and outputs and its done. But, have you ever wondered how it works under the hood?
When you are creating your own MIDI controller, this is something that you need to keep in mind, there’s much more below the note ons and note offs. Writing a code for a MIDI controller could get really complex, probably more than most of us, musicians, want to dive in. Luckily, in this world, probably someone already created a way to make your life easier.
If you are here, it’s probably because you already are in the way of making your own MIDI controller with an Arduino. Like I said before, someone already made our life easier and created a library for working with MIDI in the Arduino.
So, that’s what I’m going to show you today, how to install the MIDI library in the Arduino’s IDE, which is essential for the code that you got in the DIY MIDI Controller Workshop to work!
1 – Download the MIDI library
Go to this website and download the file “Arduino_MIDI_Library_v4.3.1.zip”
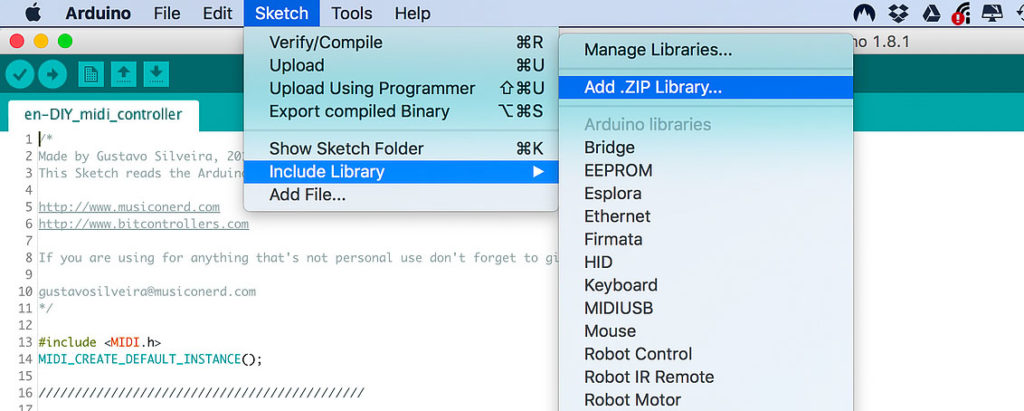
2 – Install the library
Open your IDE > go to Sketch > Include Library > Add .zip Library
And chose the .zip file that you just downloaded. And that’s it, now your ready for using your MIDI controller code!